Showing posts with label weekend project. Show all posts

Friday, August 30, 2013

Remodel: Blue Room Part I

I have the worlds best partner, he deals with so many shenanigans
Orange you glad I didn't say banana?
     While the Yellow room is not quite done (I am still trying to find the time to get those dang curtains done), we started painting the now Blue room. This room used to be my younger brother's and his paint choice was Irish flag inspired. Needless to say, that was not quite the idea that I wanted in the room that I would be sleeping in and I figured that we would paint it a little bit more of a fun but kind of neutral color in case my dad resells the house before repainting. We were going to go with a light gray with a slate gray accent wall, but the room is really too small for an accent wall in the way that we were thinking, it also helped that the paint (Glidden Duo, which I totally recommend, no smell, one coat and gorgeous coloring!!!) that we had used covered the obnoxious orange and green with only one coat and no primer!!! It was awesome considering that Hubby had to do most of it while I tended to Baby. The room is 11x11 so we did not want to paint it too dark (which it totally ended up being) and I hate tan or white. I was hoping that the colour was more blue tinted light grey but it ended up being purple tinted medium grey, but we will live with it for now. I am figuring that once I get our blue toned bed set in the room, it will make it seem more blue. On the other hand, it might completely enunciate the purple-ness of the grey.
     We finished the whole room in under three hours, with breaks for Baby and such. I had to go back later on that night to touch up after I pulled all the tape off but we finished much quicker then I had anticipated. Now we just have to move that furniture out so that I can put mine in and it will be just about done. The closet in that room needs handles on the doors and the cedar lining finished but it is a much fancier closet then the one in the Yellow room. 
     So with fingers crossed and the Hubbs home this weekend and the weatherman calling for rain, we should be able to finish up both rooms this weekend. Maybe a nice hike and a movie, too, any suggestions?


Wednesday, August 14, 2013

Remodel: Yellow Room Part I

view from doorway. Small, awkward windows but real sunlight!!!
Taping out the walls to do a second coat of yellow paint 
     So as we know, Hubby and I have moved into my Dad's house to help save up for a cross-country move and buying our first house together *squeee* But until that happens (transfer dependent at this point) we have been helping my Dad clean up and re-do some of his house. We have helped him, and a lovely contractor, re-do the kitchen and dining room. We have been living in a downstairs converted basement, which when I lived there in my wild and single-ish days, was huge at 16' by 30' but now with the Hubbs, Baby and the two older kids when they come over it's awkward, small and no privacy (this momma gets stressed when it's my bedtime!). That combined with my inability to maneuver stairs after the C-section, Hubby and I ended up moving a bed up to the spare room and staying upstairs for the past month. It has not been fun since all of our things are downstairs but the baby and I are relegated to the upstairs. With the multiple facets of the problem, my younger Brother (who doesn't want to be mentioned by name here) codename Twigs, and I are going to switch living spaces. He and his girlfriend are moving into the large one room basement area while Hubbs and I will be moving into the two smaller rooms. Bonuses: upstairs, windows, closets, locking doors, separate room for kids. Negatives: much smaller area, less personal privacy.
     So Hubby and I spent an afternoon, painting a second coat of yellow on the walls. The following day I repainted the inside of the closet, the top shelf and the hangar bar. They each took about three coats. I am not sure which primer my Dad had bought but it did not work as well as I had imagined. Hubbs and I bought Behr yellow and it did wonderfully.
see him here
and here, being uber sexy and gungho about this project
Closet painted, floor scrubbed
Hubby was so not happy with these pictures or being informed that indeed they would be put up on the blog. Luckily, he gets over things like that very quickly, and what he doesn't know won't hurt him. *insert evil laugh here*
     The closet is just waiting on me to repaint the shelving unit that fits in the bottom. It was an old entertainment center that my parents had painted completely black for my room when I was an angsty teen, so it obviously would not have matched the room now. I am currently in the process of the first coat of yellow after two coats of primer to cover the black. I plan on making fabric covered bins to fit in the cubbies for the two older kids clothing and shoes. There will also be a place for a hamper and toys. I haven't been able to find curtains that I like for the space, and I really want to test out the current trend of chevron print in grey to go with the yellow. I might end up buying sheets, or painting my own. Since we are condensing space, all of my crafting things need to fit on the top shelf of that closet (gahhh!!!). Considering it currently takes up a five by seven square of the basement, this single shelf will be an insane cut back in space. I will have to invent some creative ways to store fabric, machines and miscellany. Hopefully, by the end of next week the room will be done and I will be able to move on to the next room we have to freshen up. Here I come Pinterest!!!

And here are our not so helpful helpers! Marley, Juniata and Baby Steven all watching us paint. Although Steven does not enjoy just watching and he would much rather be in someone's arms helping


Tuesday, August 6, 2013

DIY: Dinosaur Crafts


intro2.jpg

     A few month ago, Home Depot had a Do-it-Herself workshop all about succulents and how to care for them. Their plant supplier gave a bunch of the plants out to the attendees so I now have two adorable succulent gardens that are still alive, thank goodness. I do not have the garden prowess that many people are blessed with so a low maintenance plant like a succulent is perfect, although we will see how well they fair come winter. Anyways, after planting these amazing little potted gardens and giving some away as presents, I still had some plants left over. I ended up giving them away but before that I perused Pinterest looking for neat ideas on how to display them. Luckily, they are very trendy and I found lots of adorable things to do with them, none of which I actually did.
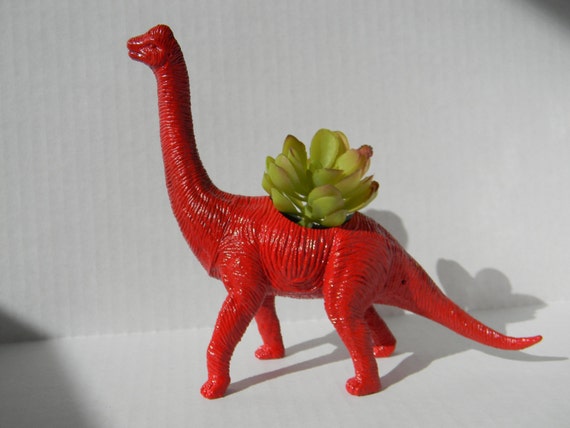
     But I did find this:
Dinosaur Planter in Red Great for Birthdays Get Well Soon and New Job Gifts
I found an entire store on Etsy that makes them *squee*
 Which led to things like these:

found via Pinterest here
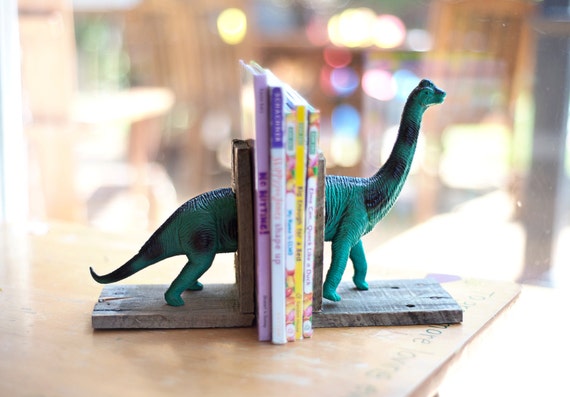
Custom Pair Reclaimed Wood Pallet Wood Dinosaur Bookends Nursery Child's Room Rustic Cottage Vintage
found on Etsy here
found here
Found here
Which are all really neat, and cute and I kind of want to decorate Baby's room in dinosaurs. He doesn't even have his own room yet but still. Then I found things like this:
     A lot less useful, but I may or may not have a slight obsession with toy dinosaur crafts and bobbles. It is on my list of things to do this summer to attempt some of these crafts. More than likely, not the dinosaur high heels. But the other ones are pretty adorable and now I have a little boy that will one day need adorable dinosaur paraphernalia.
Succulent-Gardens
find it here at Being Alison


One other blogger was at the workshop, sponsored by the Home Depot. Being Alison did live Twitter updates during the workshop and posted lots of pictures all about it and I followed her while at the store. It was a ton of fun and I definitely suggest going to one in your area. Make it a date night with some friends, Starbucks before and maybe a couple drinks after. Especially if you found a babysitter already!


Wednesday, July 10, 2013

Countdown: Due Date and Harry Potter Nursery Update!

     While we have had absolutely no signs that Baby Rogers is ready to head out into the big, bright world, according to the doctors, he or she is due today! So in the spirit of a new baby, I'll share a couple pictures of the things that I made to decorate the nursery (aka the part of our bedroom that is roped off for baby's use). While I was going to try for an overbearing Harry Potter theme, time and space (and Hubby's complete lack of enthusiasm for Harry Potter, he had voted for superheroes) did not allow anything too over the top. It is nothing too elaborate like this gorgeous one here, which I had found on Pinterest and may have slightly inspired the idea from the start as you can see in my Harry Potter Pinterest board. But there are some cute, if tiny bits of Harry now in my bedroom to entertain me and keep me company until Baby arrives.

Hogwarts Crest Painting:
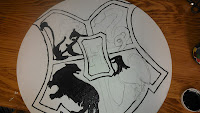
      I started with a couple paintings, easy enough to do in an afternoon while taking multiple bathroom breaks and naps. I have a couple canvases that I had picked up from Michael's for .01 from their clearance section so this seemed as good a reason to use them as any. I researched a bunch of different Hogwarts's crests to use, found a few that I liked and freehand drew a conglomeration of the ones I had found through Google. After taking way too long to perfect all of my lines (looking back, I should have just printed out a picture and traced it onto the canvas, it would have been less stressful to my inner perfectionist). Then I traced all of the pencil lines with black acrylic paint and filled in the parts that would become the all black silhouettes of the school mascots. In this aspect as well, I should have done the color first since I did all of the black and then went back to redo the lines so that they were more clean and distinct. The process after the freehand drawing was simple, color inside the lines! So I filled in the school colors, painted the background my favorite neutral grey, used puffy paint to outline the lines of the crest and stapled a slightly Gryffindor-esque fabric around the painting to frame it. While I was entirely too pleased with the outcome, DH needed me to explain what it even was, I know, horrible, right? But it was cute, easy and actually made it seem like I had a theme!

Whomping Willow Painting:
      This one, I was not as pleased with. I wanted to go with the darker colors that are more prevalent in the Harry Potter movies, but by the time all my paint dried, they all kind of seemed the same color, blending the sky with the branches too much. Again here, I just searched for Whomping
 Willow silhouettes, and found a few that seemed relatively easy. Initially, I wanted to do the entire tree in buttons, similar to the projects found on this lovely blog, which, staring at the painting now, I still might do. After spending almost an hour sorting through hundreds of my buttons, I didn't think that I could pull off the look that I was aiming for, it just didn't seem to be clicking for me. So to the trusty acrylics I went. Unfortunately, the results were not as inspiring as I had wished, so this project may be redone shortly, depending on how many burp cloths I can sew up before Baby gets here.

Flying Key and Owl Cage Mobile:
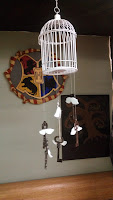
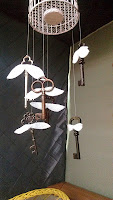
      Do you remember the flying keys used to get through the Chamber of Secrets? Exactly right! That's what these keys were inspired by (and a picture on Pinterest with a defunct link or else I would send you there) and I think they came out very cute. It had taken me while to collect the right kind of keys in the correct size, I had the large silver one from Michael's just sitting around, I had probably bought it almost two years ago at this point. I found one of the smaller rust colored ones in a manufactured shadowbox from the dollar store but I couldn't find anymore that fit what I was looking for, until I walked into Michael's recently to purchase some of my favorite Martha Stewart acrylics and my niece pointed them out. We bought one of each of the styles (costing around $6), although I wish I had bought a couple extra because it seemed thin when I was done. I also found the white birdcage (candle holder) there in their value section for around $2, which was good because the tiny silver one that I had purchased for the project would have been much too small for the size of the keys that I used. So far the mobile cost me $10. After cutting out white felt wings, using hot glue to adhere them to the keys and sewing thread to tie them to the birdcage, it was 90% finished. I am trying to figure out what kind of owl I want inside the cage. I had a wooden cutout of an owl that I started painting but looking at it now, I feel unconvinced that it will look right and I think a felt one might look cheesy, so that part of it is in slight limbo as of right now.

Bassinet Refinish:
      My dad had given this bassinet to us for the baby, but I am not a fan of white or pastel nursery items so I had to do something to it to spruce it up and make it special for our baby. My youngest brother slept in it when he was born, so I definitely wanted to keep it relatively the same, just a tiny update. I also did not want to go out and have to purchase a lot of stuff to redo it, but I already had yellow spray paint on hand, Hufflepuff represent!
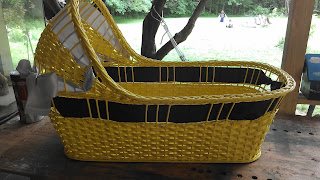
     The top picture is the before (kind of, I forgot to take one and figure a partial was better than nothing) picture, the one the the right is the after. While Hufflepuff's colors are yellow and black, so are the Steeler's, so while I set out to pay homage to my favorite book series, I also ended up celebrating the football team that the majority of my family is deeply devoted to, a slight miscalculation that turned out okay. They silver and black ribbon I had purchased on clearance from Joann's for $1 a piece so in total, the bassinet remodel cost me around $8.

Chest of Drawers:
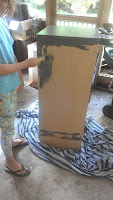
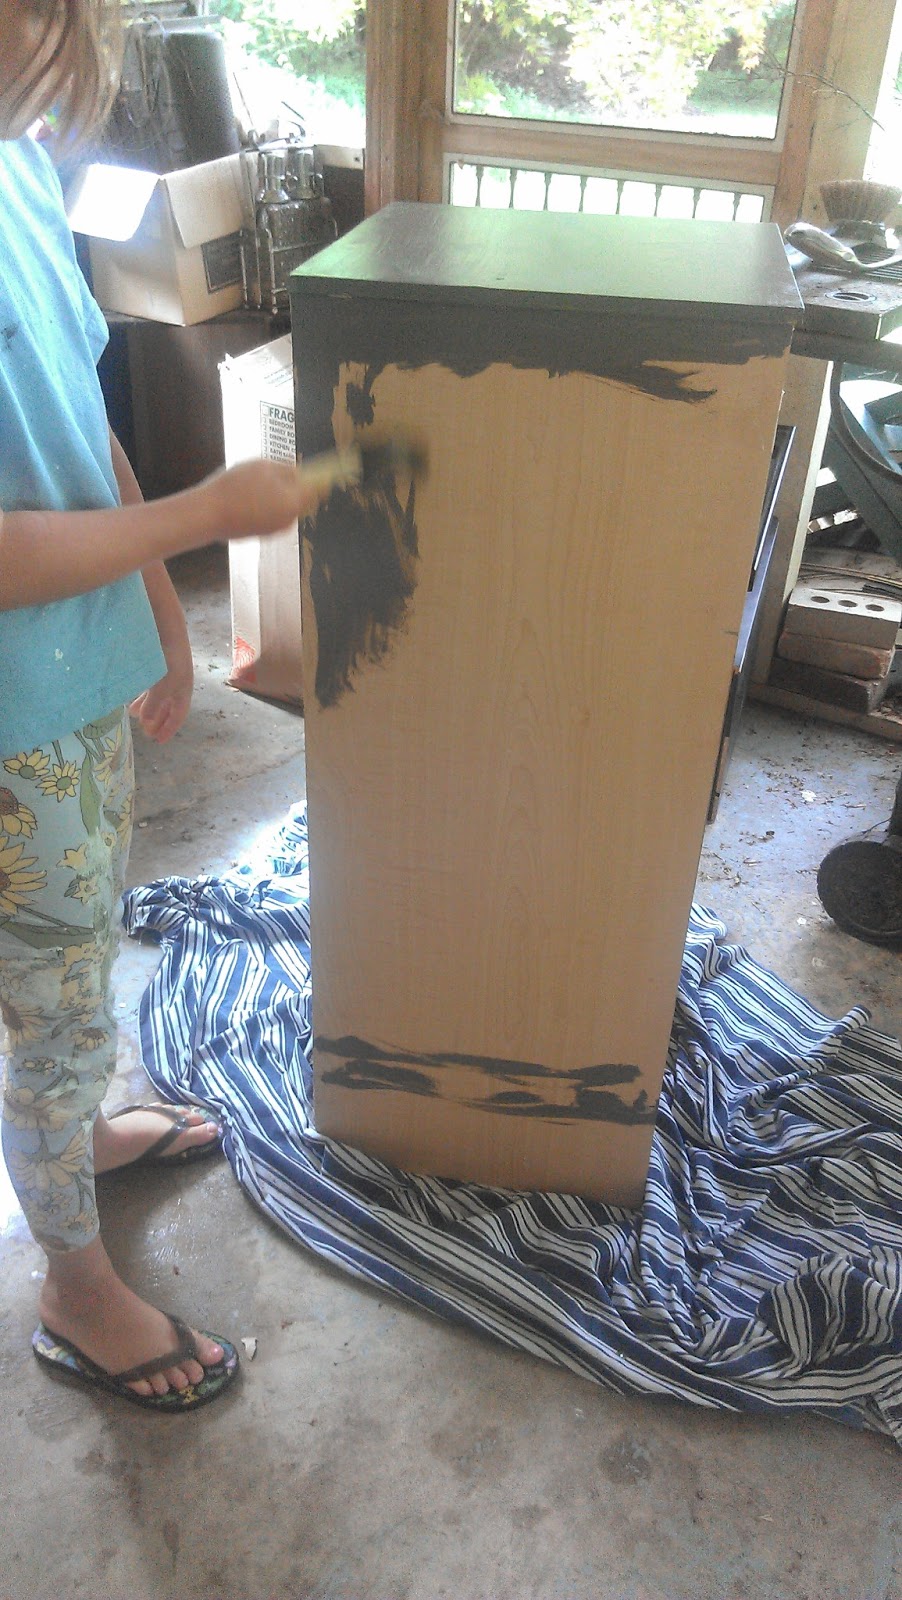
     This project actually took the most time and the least planning, thus the most time. I had an old set of drawers that was used for the kids clothing but was getting too small for all their things so I planned on repainting it and using it for the baby. I knew that it was difficult to paint laminate furniture but I had read all over the internet that it was possible and not nearly as daunting as previously indicated. So I took the drawers out and lightly sanded the entire thing, which was my first mistake, I should have heavily sanded the entire things repetitively. I had bought lovely Martha Stewart indoor paint from Home Depot for $20 for both colors, but they were perfect. Then I went to town painting it, the drawers took almost three coats by the time I was done, just to get an even red throughout the grey only took two coats (see little E in the third picture, helping me out!). After it was all painted, I swapped out the boring wooden knobs for white ceramic ones with skeleton keys on them, also from Michael's. After it all dried, i ran my hand over it a bit and took my nail to it and the paint came right off. So after staring at it angrily for a couple minutes, thinking that I would have to sand the whole thing over again to repaint it (or burn it, which did cross my mind) I figured that I would try a clear sealant. So back to Michael's I went. I sprayed the whole thing with sealant and had great results, no peeling or scratching anywhere. When I went to put it into our room though, the humidity made it so that the paint sticks to everything. My plan would have worked perfectly outside of that. So for $25, as far as this project is concerned, I would have done better to just go purchase a new dresser, or left it as is. But it does match my theme!
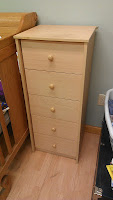
 

Gryffindor Felt Number Block:
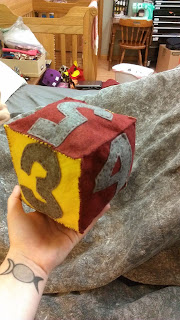
     While Hubby and I were watching Doctor Who while in bed, I cut out and sewed together this precious morsel. I had sewn a few other felt cubes for a friend's baby shower, a giraffe and an elephant, so I wanted to make a couple for our baby, too. This was the first one that I made, I later made a hippo, zebra, and pig but those might go to the same home as the first two eventually. I used a simple square pattern that I had for quilting, cut out the felt from Gryffindor colored sheets that I had bought at Hobby Lobby for .25 a sheet and sewed it together with embroidery floss. Other than a slight miscalculation where I cut out a 7 and was thoroughly confused why it wouldn't go anywhere, it came out adorably. I will probably make three more to match the houses but with letters on them instead. I even put a little bell on the inside so the baby can make some noise and I stuffed it with poly-fil left over from cleaning out my mother's storage unit last year. So for around $3 I made a cute Harry Potter felt block for soon to be here Baby Rogers.
       So far those are the most exciting projects that I have made. I have twenty or so burp cloths on the docket, another painting and my little owl for the mobile. I also want to made a cover for our stroller but I am not sure that will get done before baby gets here, we are supposed to have a huge thunderstorm in the next couple days and there is hearsay that many women go into labor during storms!


Wednesday, July 3, 2013

DIY: Framed Jewellry Holders

     With only 8 days left before my due date, I figured I can sit down in my nice cool basement and write up another post before I head our grocery shopping!
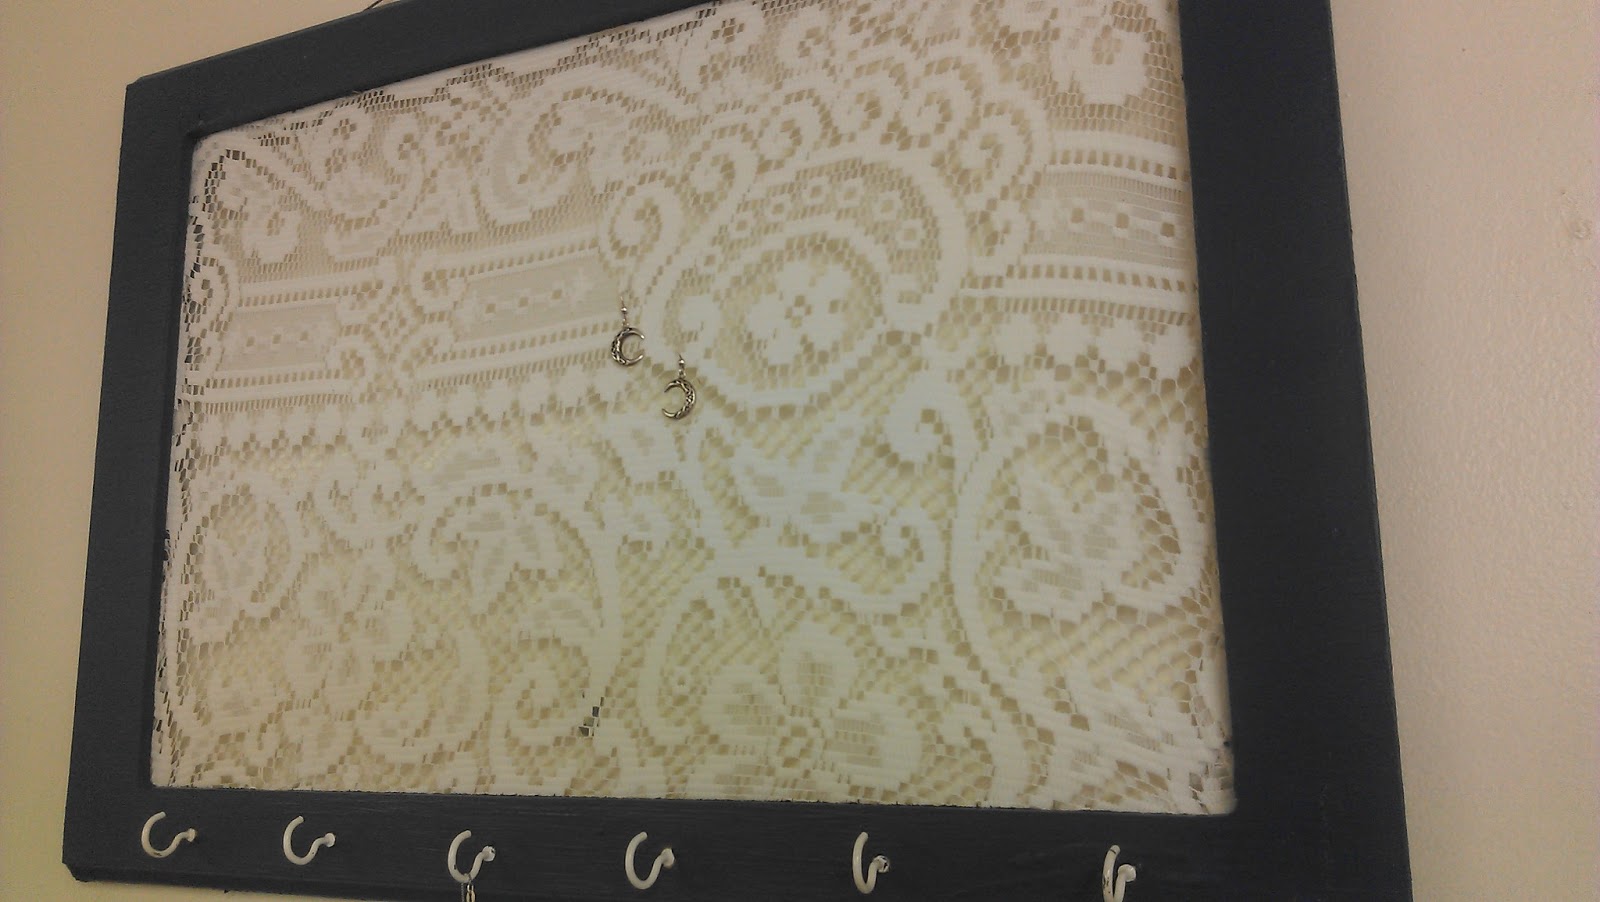
     While not a tutorial, this is more of a "hey I saw this on Pinterest and had the opportunity so I grabbed it" kind of thing. While down in Pennsylvania on my little mini vacation, I was helping my wonderful grandfather make new cabinet doors for a customer. The original doors were just wooden frame (see picture to the left) with stained glass inside, the customer wanted to save the stained glass but make new frames to match her custom cabinets that my grandfather had already made. So after taking them apart, he told me to take the old frames to the dumpster and on my way I got distracted by something shiny and the idea to make jewelry holders out of the old frames. You can find pictures and ideas all over Pinterest for hundreds of variations of these and full on tutorials that will explain it in much more detail, or just do a general search for "DIY jewelry holder." 

     After sanding all the sides of the frames and removing all the old hardware, I went in search of some paint. My grandfather does a lot of traditional style work so the colors that he had were not necessarily the bright cheery ones that I would have picked but they worked for this on-the-fly project. The sanding done and a few coats of paint on and the frames were ready the lace background used to hold earrings. We raided my grandmother's old curtains for ones that were past their prime and cut them to fit the frame. The picture to the left is of dear sweet hubby stapling the lace to the back of the frame. After that was done, we picked out some interesting and slightly matching cabinet pulls and cup hooks, drilled them into place, hung picture frame wire on the backs and called it a day. All in all, the projects cost around ten dollars for three complete jewelry holders. Although, Hubby did point out that if we took into consideration our labor costs and any sort of profit margin, we would have to sell them for $75 each, so maybe not the most profitable venture. It was fun and I enjoyed trying a new project and convincing DH to help out. Can't wait to try the next project!!!